
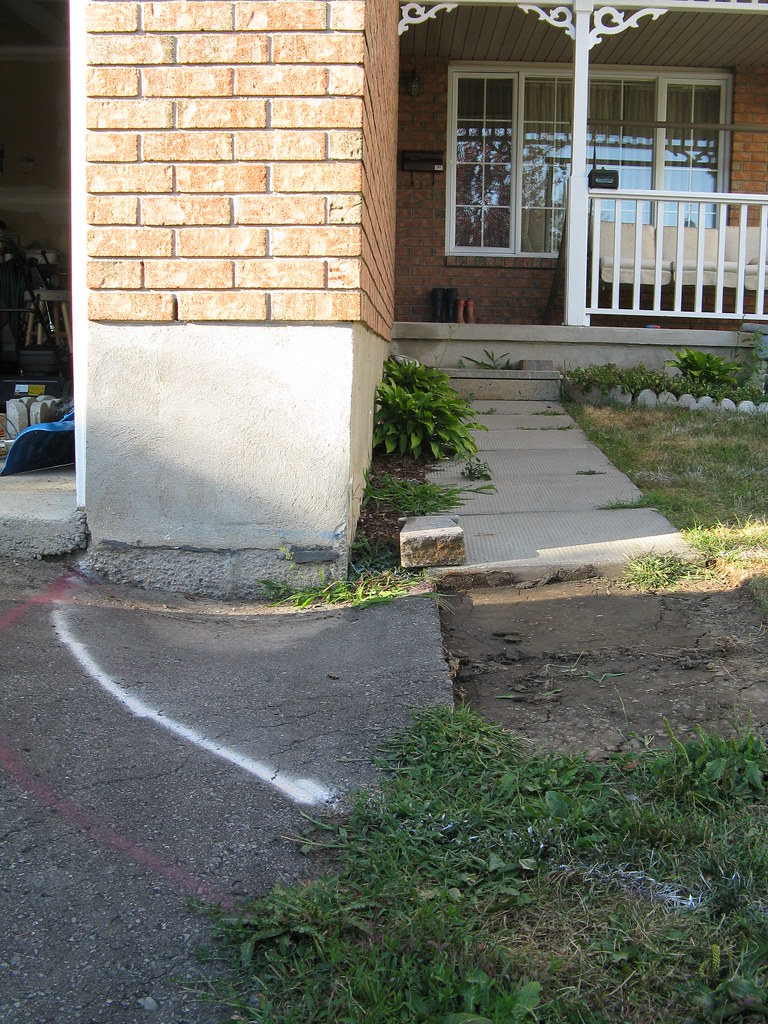
We were tired of the boring paving stones that came with our house and all of our neighbors were getting snazzy interlock entrances done so we decided to give it a go ourselves. My wife designed an intricate multilevel circular design with intersecting cuts and we got a line on a place that supplies the home stores with brick (why buy from Rona when you can buy from the place that sells to Rona?) so we got a catalog and went out to the place to choose the brick. The place only sells to contractors and I had a friend who did contracting on the side who would place the order for us when we were ready. My wife and her friend had designed the layout in Autocad with a ton of measurements and one nice sunny day we went out to spray paint the design on the front lawn. With the design being made up of four huge circles (the largest being an almost 19 foot arc) the best way to do this was to stake out sticks at the radius points, attach pieces of string cut to the proper radius length to the sticks and follow the extent of the arc leaving a spray paint trail behind.

Holy crap it was huge. We won't have any lawn left. The early design also incorporated a pathway that seemed to drop off into space and probably create work for me later (follow the yellow brick road) and two built-in planter areas for bushes or flowers (heck a tree if you wanted). The pathway ended up cutting right to the neighbors property line so we had to simplify. The circles all got tightened up, the pathway disappeared, we only left a single planting area and we got something we both liked. We had picked out a wall product and pavers so now it was time to order the stuff. We started by staking out the new design, spraying it onto the lawn again in a different color and checking all the measurements one last time.

It took me three days to figure out how much product to order - and that was with a hyper-accurate plan. One of the problems was that I had to impersonate a contractor in that I had to pretend to know what I was doing. Contractors order by skid layers. Johnny homeowners like me walk into home depot, grab a cart, and start piling bricks into it. When I screw up and need more, I go back and buy more. So how many blocks in a skid layer? I spend a day googling charts on the Internet until I found palette layouts I needed. What sucks about ordering by the skid layer is, if you get 16 blocks in a skid layer and you only need 8 blocks then you get another 8 just for fun! Contractors also deal in some weird measurements like wall square footage. I don't need to know that, my wall is two bricks high for the most part, I just have to know how long and how many levels of brick I'm piling up. So I had to simplify a lot of the numbers to make sense of them. The capping was weird too, they have this formula you so where you take your linear footage and multiply by 2.68 to get the number of modules you need, and a module seemed to be a collection of three bricks,an A, a B, and a C. I spent half a day staring at the front lawn trying to visualize where everything would go and when I ran into problems in my head I realized that I needed a 3D model to be sure I had it right.

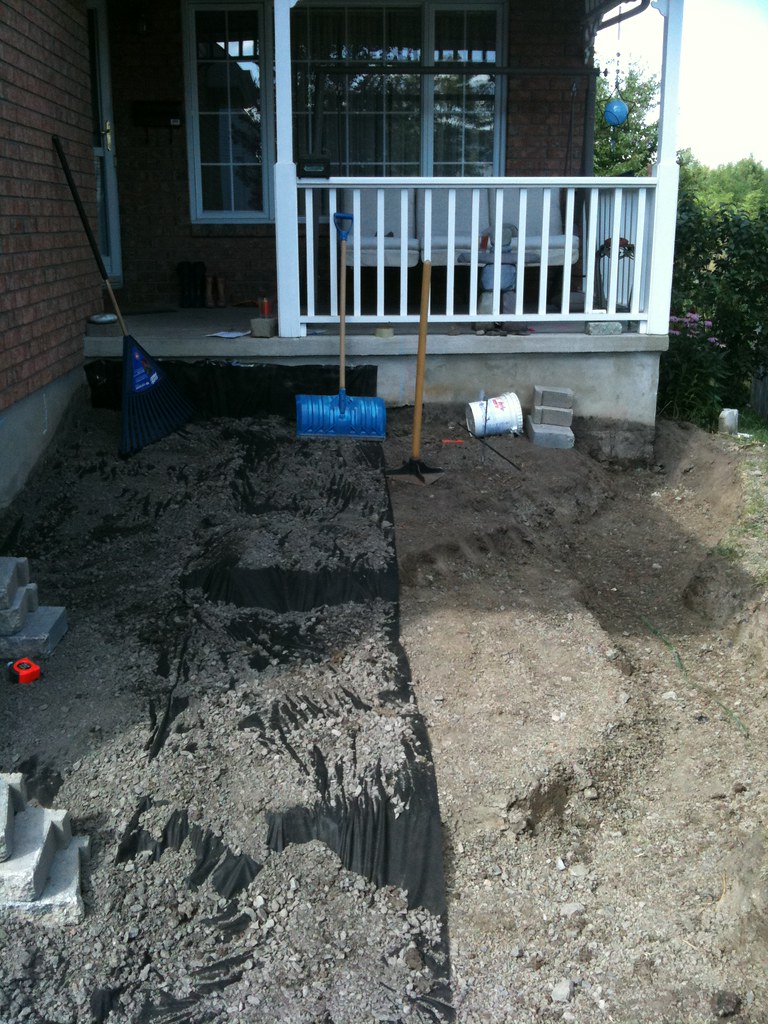
I used Google 3D sketch up to mock up the interlock layout in 3 dimensions and that's where the problems began to show up. When it was designed, the layout did not take the dimensions of the product into account. We had worked out a 5 and a half inch step height but had bought a product that was 3 and a half inches high. Quickly we changed the design to use a 7 inch step so each step ended up being 2 bricks high. The way walls are made there should be a hidden row underneath for the wall to sit on so you end up buying a whole row of wall just to bury it :-). Excavation was also an interesting proposition. I wanted 12 inches of crushed stone underneath everything but since my lawn slopes up to the house and the design was a bunch of terraced landings I figured I probably didn't have to dig up the whole front lawn. Turns out I had plenty to dig (underneath the outside of all the walls and the first two circle landings) but the rest of it was piles of crushed stone. Getting rid of the earth was easy, I just dumped it in my back yard to level off the back of my property. The crushed stone was also readily available at a small quarry up the road for $32 a loader bucket full (my Dad has a trailer and I must have done 7 runs to the place and emptied with a shovel all on the front lawn).

A few days later the skids showed up on a delivery truck and there was a small problem with the order my contractor friend had put in. The supplier had misunderstood and I was missing about 34 capping blocks. I had to make a trip out to the place to pick up the missing blocks after weighing the A,B,and C ones on my bathroom scale and calculating it to be 1400 pounds (They weighed 57, 37.5 and 27.5 pounds respectively). I needed to make sure the truck I used would be able to take it. Knowing the weights of the stones was useful when the forklift operator pulled up to the truck and let me know I was going to lift them off individually by hand and load my truck with them. Woohoo!

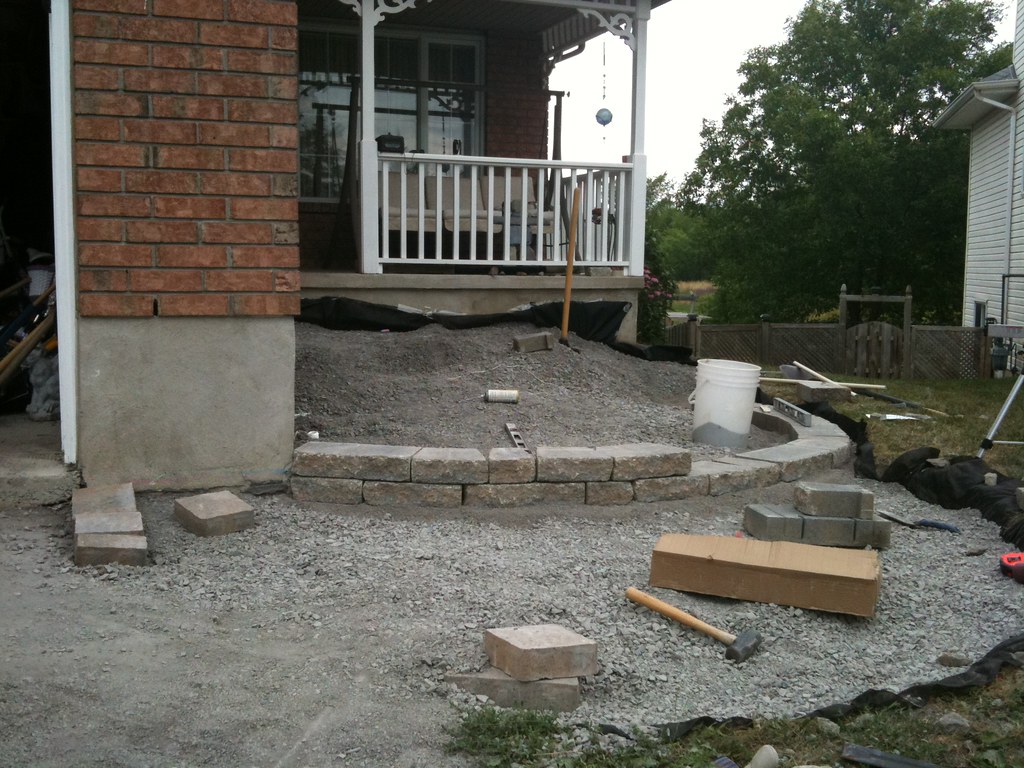
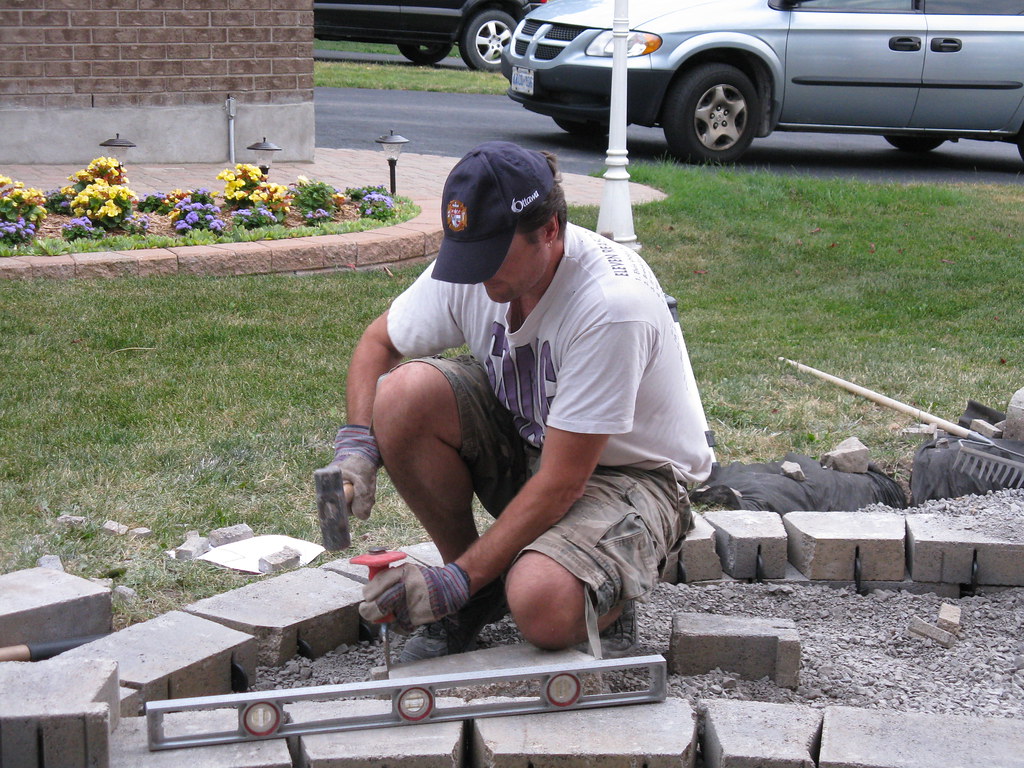
The next day I started laying out the wall and the caps. The first level was ok, the second one was better and the third one was pretty much perfect so I went back and recut the first one. I discovered that in order to cut a nice curve you need to place the two blocks side by side on a curve, measure the outside edge of the triangular space created by the curve and distrubute it evenly across the front of the bricks where they touch side by side. This gives you radian shaped wedges that form a natural curve. Fortunately I was able to borrow a cutter. Unfortunately the cutter only had a 3 inch cutting depth and I had 3 and a half inch blocks. That meant I had to cut every block at least twice, on the top and again on the bottom. Furthermore, the blocks were 12 inches long and the max length I could cut was 10 inches. That meant each block was actually cut 4 times, top, bottom, front, back. A lot of blocks were cut on both sides so that was 8 cuts per block. I got fancy in the areas where the bricks met at the curved arcs and recessed them (so it looked like it was coming out of the wall). I cut a lot of blocks.....

As I was outside doing all of this fun stuff I got mistaken for a contractor no less then 3 times. Neighbors would wander over and ask for a quote. Then I'd take my safety sunglasses off and they'd go "Oh sorry, I didn't recognize you, Oh so you're doing this yourself." Other neighbors that caught on to this would come over and offer advice. Most of it I already knew and had researched but one or two had some great tips. It's amazing how many people think that landscaping fabric is there to stop weeds. Weeds need sunlight and the seeds come in from the top and wedge between the cracks of your brick. The landscape fabric is there to prevent the soil from creeping into the crushed stone and shifting it. It provides a barrier between the two materials.

One guy alerted me to the fact that I was building some Hornet condominiums into my design by leaving nooks and crannies in the back. I took his advice and back-filled the hell out of them with large stone the little buggers won't be able to excavate.
As far as product ordering, it was pretty good. I was missing ONE capping block (think I was going to order a skid for one block?). I went back to the brick place and they gave me a demo block for free. It was not exactly like the other ones but it would do where it was going.
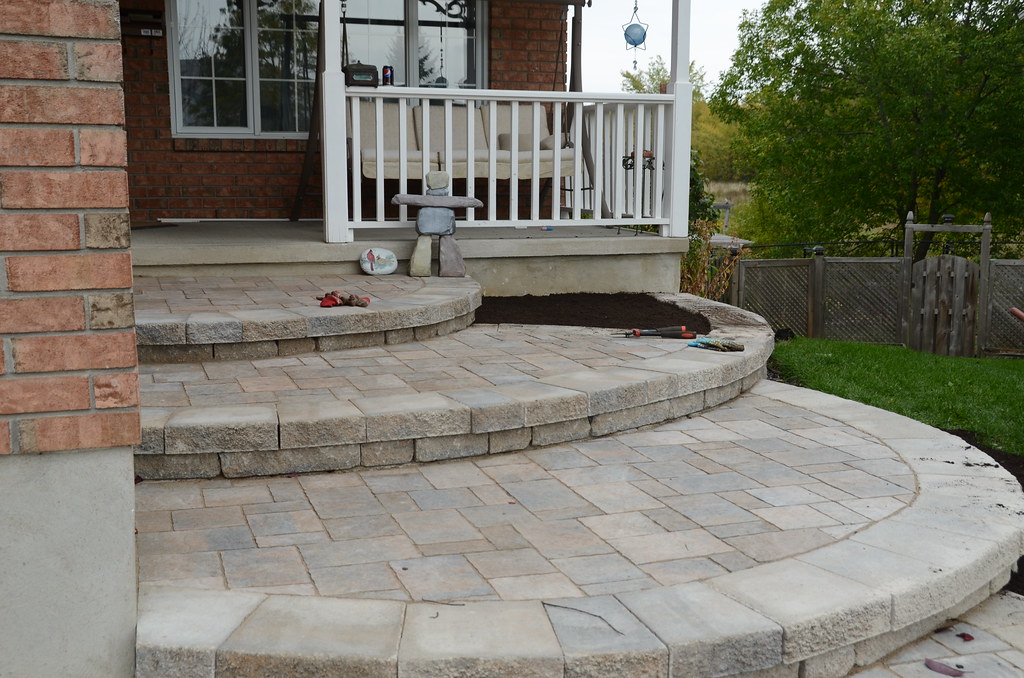
When I got to the bottom row, I ran into my last gotcha. I had not taken the slope of my lawn into account where it encroached on the design. I had to cover a 1 foot drop over 3 or 4 feet and it just wasn't happening. The angle looked horrible. It looked like I needed a whole new step (Hey, on the bright side, I was able to order my missing CAP and throw away the stand-in demo one).
Tips I'd follow if I was to do it all over again..
1. Take the dimensions of your brick into account during the design phase. If your brick is 3 1/2 high, consider a step height of 3 1/2 or 7 inches..
2. Don't forget that the top of your landing is kind of like a step (Doh!)
3. Nothing beats a 3d Mockup on your PC to find your mistakes before you make them.
4. Don't forget to take the slope of your land into account.
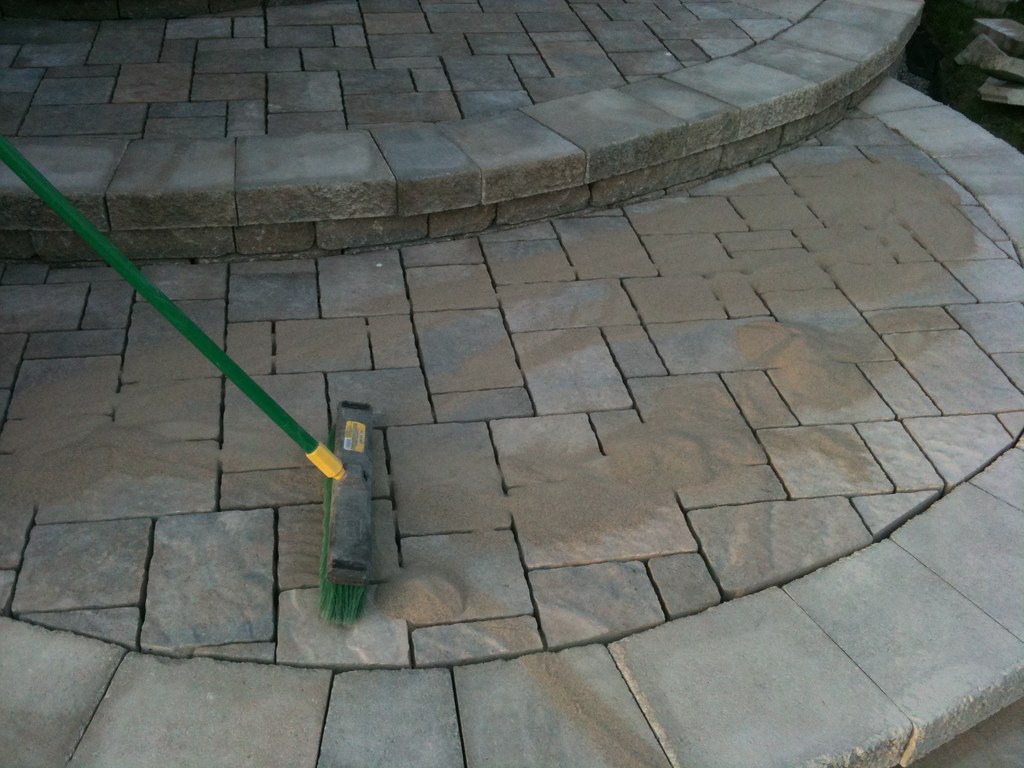
5. Tamp and compact they hell out of your crushed stone THROUGHOUT the process and wet with water between tampings. It helps later on.
6. There's no such thing as TOO level. Get it perfect everywhere.
7. Don't aim your brick cutter at anything you don't want coated with a fine film of sand-blasted goop.
8. Do every step of the process the best you can make it. It's not worth doing it over later on.
 Holy crap it was huge. We won't have any lawn left. The early design also incorporated a pathway that seemed to drop off into space and probably create work for me later (follow the yellow brick road) and two built-in planter areas for bushes or flowers (heck a tree if you wanted). The pathway ended up cutting right to the neighbors property line so we had to simplify. The circles all got tightened up, the pathway disappeared, we only left a single planting area and we got something we both liked. We had picked out a wall product and pavers so now it was time to order the stuff. We started by staking out the new design, spraying it onto the lawn again in a different color and checking all the measurements one last time.
  It took me three days to figure out how much product to order - and that was with a hyper-accurate plan. One of the problems was that I had to impersonate a contractor in that I had to pretend to know what I was doing. Contractors order by skid layers. Johnny homeowners like me walk into home depot, grab a cart, and start piling bricks into it. When I screw up and need more, I go back and buy more. So how many blocks in a skid layer? I spend a day googling charts on the Internet until I found palette layouts I needed. What sucks about ordering by the skid layer is, if you get 16 blocks in a skid layer and you only need 8 blocks then you get another 8 just for fun! Contractors also deal in some weird measurements like wall square footage. I don't need to know that, my wall is two bricks high for the most part, I just have to know how long and how many levels of brick I'm piling up. So I had to simplify a lot of the numbers to make sense of them. The capping was weird too, they have this formula you so where you take your linear footage and multiply by 2.68 to get the number of modules you need, and a module seemed to be a collection of three bricks,an A, a B, and a C. I spent half a day staring at the front lawn trying to visualize where everything would go and when I ran into problems in my head I realized that I needed a 3D model to be sure I had it right.
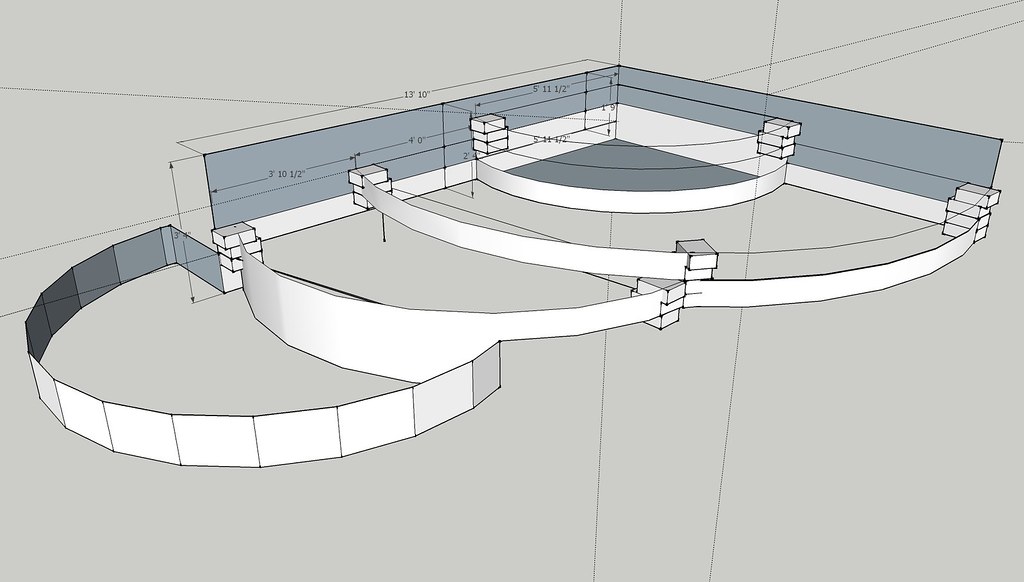
 A few days later the skids showed up on a delivery truck and there was a small problem with the order my contractor friend had put in. The supplier had misunderstood and I was missing about 34 capping blocks. I had to make a trip out to the place to pick up the missing blocks after weighing the A,B,and C ones on my bathroom scale and calculating it to be 1400 pounds (They weighed 57, 37.5 and 27.5 pounds respectively). I needed to make sure the truck I used would be able to take it. Knowing the weights of the stones was useful when the forklift operator pulled up to the truck and let me know I was going to lift them off individually by hand and load my truck with them. Woohoo!
 One guy alerted me to the fact that I was building some Hornet condominiums into my design by leaving nooks and crannies in the back. I took his advice and back-filled the hell out of them with large stone the little buggers won't be able to excavate.
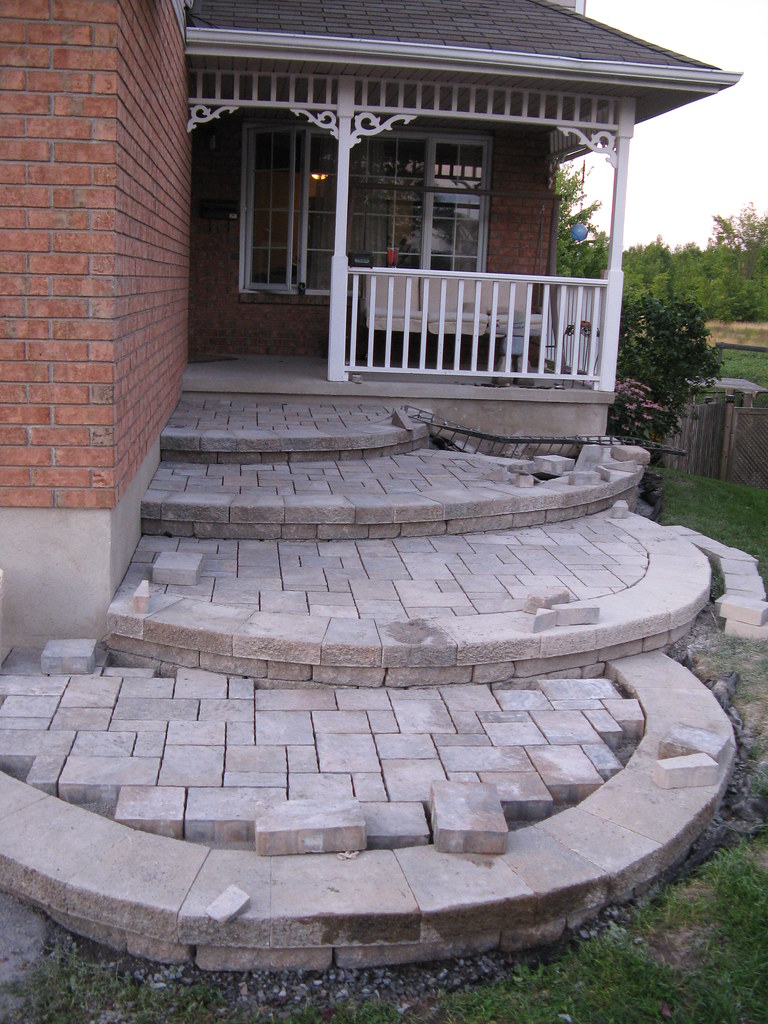
No comments:
Post a Comment