Wednesday, August 19, 2015

People who watch videos on their phone full blast with no headphones 3 feet away from me are idiots.

Is this a new "I have no self awareness" thing? People watching videos on their phones at full volume when waiting in line at the grocery store, subway, or sitting by themselves at a table in a half empty cafeteria while they are 3-4 feet away from someone like me?


GET HEADPHONES YOU FREAKS!

I'm going to do something embarrassing the next time someone does that near me.

"What are we watching? Ohh. old hockey fights? John Leclair and the Legion of Doom? Fascinating"

"So you missed the Video Music Awards live eh? How awesome. Is Justin Bieber presenting?"

 "So the subway guy that used to be fat's a pedophile? I guess it's important to catch up on current events like that in line at the express lane at the IGA."

"That sounds like a fascinating Japanese Anime. I especially love the pumping Japanese glam metal soundtrack. It's so helping me choose my sub's condiments..."

(To the stranger in the cafeteria after I pull up a chair and sit down beside him)
"Can you turn that shit up? What are we watching?"

Saturday, May 09, 2015

The Water Heater Fiasco 2015

Looking at the bright side, at least we have our health and food to eat no one is dropping bombs on us! Problems you can fix by throwing money at them and enduring a minor period of inconvenience
is not the worst thing that can happen to you.

Sometime back in February I was looking at my gas bill and was again bothered by the $25 water heater rental charge. Direct Energy (or whatever they are called now) were certainly getting the better end of that deal because the tank had never caused me any problems and was 17 years old. Thinking that $300 a year might be better spend elsewhere I went about getting a quote on getting my own water heater installed. I researched tank-less and rejected it due to cost and was quoted $1400 (they had to add some new piping to bring stuff up to code) on a 50 gallon old fashioned kind. Since 5 years of rental was $1500 and the new tank after install was $1400 I figured in less than 5 years it will have "been paid", and everything after that was savings.

The guys came on a Sunday with a 60 gallon by mistake (no extra charge). The install did not go well though and the guys ran out of time and had to come back the next day to finish. They took away the old heater as part of the deal to return it to depot. We had no hot water for most of Sunday and Monday. I had no idea what a first world problem pain that was. Clothes washer, dish washer, showers, baths, even washing your face with hot water, not an option.

They came back on Monday, finished up, even knocked $100 off the price for the extra delay and everything was peachy! There was an issue with my Direct Energy bill afterwards though. The water heater rental has yet to come off . There is an order of operations to taking our tank back, you need a number FIRST then you bring it back, my guy brought it back and I got a number later, so,, yeah. They tell me it takes several cycles to catch up. They say the 4th bill should do it so I've paid $100 in rental charges for a tank I don't have ;-)

Fast forward to today when the clothes washer upstairs malfunctioned and decided to drop several gallons of water on the floor which ran down the nearest vent which happened to exit above the water heater in the basement and give it a bath.The water did not seem to do any damage to anything else and quickly found it's way down the drain.

Later that evening when we ran out of hot water it was apparent that the water heater was not working. Upon close inspection the thing looks FRIED! The GAS Control Valve LED's don't light up and the blower assembly took a good douse. There was a ring of water inside the tank and this started to rust the open bottom lip of the tank.

So now I'm at that place I've been too so many times before. Do I pay for trial and error repairs to get the stupid thing fixed and have it break again or just assume the whole thing is suspect and look at replacing it whole. Just like my stupid lemon of a Jandy Pool heater, my crappy Bosch dishwasher, and Fridge which have all eaten $1000 in repairs and just got chucked out soon after. Repair people stink these days and don't even try to find the issue and just replace over-priced parts at random. When's the last time you saw someone get a multi-meter out and try and trace a fault?

Bloody hell. I'm going to call Direct Energy tomorrow and get them to install a new rental tank (again). $1300 down the toilet.

To top it off, the Dishwasher is making chewing sounds, I called up the service guys today. It came off warranty a week and a half ago, end of April 2015. There's usually a third bad thing that happens at times like this, we'll wait to see.

Morale of the story, If it ain't broke, don't fix it. When you try to save money, it sometimes ends up costing more &^$%$#*^^!


test

bla blka

Monday, January 19, 2015

Bring back the Death Penalty for people who code Browser Hijacks and web popups.


This is what we should do to any web developer that spends one millisecond of their time coding web/blog/browser hijack code. I would add a sign under each body saying "I wrote the Media Player Update" popup, or "I wrote the "Possible Privacy Breach" popup, or I wrote the "Talk to a technician in Czechoslovakia" popup. Life imprisonment would be treating them too good. Bring back the Death penalty....

Who's with me? Grab your torch and pitchfork!


Friday, January 16, 2015

The luggage incident...

Last Sunday my wife was away all day Scrap-Booking. My youngest had a play date and later that afternoon, when the other parent came by to pick up their kid, my daughter asks:

"Where's Mom?"
"She's scrapbooking." I said.
"Then why did she have luggage with her?" She asks...
(This is in front of the picking up parent)
"That's not luggage, those are scrapbooking totes, they look like luggage." I explain.
"I know what the other things are, she had luggage!" She insisted.
(The other parent is looking around wondering how quick he can pick up his kid and get out of there)
"They're totes, don't worry about it, say good bye to your Freind.." I say.

They leave and I think, wow, he must think we're getting a divorce (grin).... That's funny, I'll have to tell Julie..

Later on in the week, I see the other parent while we were picking up the kids after school and he looks at me and gives me that thumbs up "Is everything ok?" look but I didn't remember the Sunday thing and had no idea why he was looking at me like that so I gave him a weird look and he kinda nodded at me knowingly.. Dammit, he thinks I have marital problems (grin)..

So today I run into him and he kinda looks away as we pass in the hall (doesn't want to make me feel bad(grin) and it hits me..

Last Saturday night my wife came home with new luggage she had just bought as a gift. It was her best Freind's birthday and she was also booked to go down south and the luggage was a birthday present my wife was going to give her at the scrapbook thing. I helped her figure out how to get into the TSA locking mechanism that night and totally forgot about it. SHE DID HAVE LUGGAGE!

So my kid had it right all along. Now how do I go about explaining this to my kid's freind's parents so  they'll let her come over on future play dates(grin)...

No one wants their kid over at someone's house in the midst of a messy separation.. Oh well.. Let the rumour mill fly.. Damned luggage..

Tuesday, January 13, 2015

Blogspot www.adcash.com Hijack/Redirect www.freecounterstat.com sucks!

Thought I'd make a post since I was unable to find key words to point me to a quick fix to the problem and had to fix it myself the hard way. A few weeks ago my wife mentioned that visitors to her blogspot/blogger blog had contacted her mentioning that they were getting served random popups to a variety of crap sites. Some sites wanted to install viewer software, others just wanted to sell you crap, make you watch videos. Make you clickity click everywhere.. etc..

It would only do it once per visit per day, which meant when it happened and she told me about it, I asked her to repeat the steps to recreate the behavior and it would not do it again. How annoying is that? I'm used to Personal Computers and servers behaving in my presence because they are deathly afraid of me (as they should be) and flaking out when I leave the room but eventually I actually saw it happen with my own eyes.

Whatever it was wrote a local cookie, same name as the blog itself and deleting/blocking access to these would make the redirect fire each and every time Which made it easier to troubleshoot.

The sites were a multitude random crappy click generators. It was all starting with the site www.adcash.com. It would go here to find the random re-direct of the day:


offer.alibaba.com
lp.freegameszonetab.com
www.roblox.com
lp.bigfarm.goodgamestudios.com
www.binaryoptionsbrands.com
binaryoptionsbrands.com


So many of which it became impossible to research the problem from the back-end, like, "Hey I get re-directed once a day to this site (and this one the next day, and this one, and this one..) so you can't look up any info that way, it's a buckshot of annoying websites and the info is safe in the forest of keyword website crap. Any hits that did come up also only pointed to PC malware cleanups which was not the issue in this case. All the PC's at home are pretty well-protected with MS Security Essentials, Spybot Search and Destroy, etc.. This was a problem with the Blog itself. Had it been hacked? How was that possible? Can clicking on a bad popup while logged into your Google account (which we always are) write malicious code? Unlikely. That's a lot of clicks and not easily scrip-table.

I looked through the Blog template (3000 lines) and found an odd entry in an unimportant place in the layout. It was a 200 character nonsense string with a "Base64" function in front of it. This is handy for turning cleartext into gobbledygook when trying to hide stuff from people. You have some nasty commands you want to hide, you convert the string to base64 and tell the template to decode it on the fly. I popped it into a BASE64 decoder and saw cleartext and that it was calling some binary code. Out it came.

Didn't fix it. Not sure what is was. Next.. Time to get out Wire Shark and start looking at packets or process monitor and look for the needle in the haystack.. But wait!

Turns out the site I found the BASE64 decoder on was chocked full of info. It was http://aw-snap.info/articles/redirects.php. Not only did it go over the BASE64 thing but a host of other nasty tricks. They had a Blogger Tool you could plug your blogspot blog into and it would check it (tried it but no luck).

In fact there was not a lot of issues on the Blogspot/Blogger front apart from some kuno​ichi gadget issues. I figured removing javascript blocks one at a time was a good shortcut to try, so in a fit of brute force and ignorance I backed up the Blog template again, documented the layout and started removing HTML Javascript widgets. Damned if it wasn't the second one causing all the fuss. It was a visit counter from www.freecounterstat.com (counter2.statcounterfree.com to be exact) and this was the thing writing the cookies and calling the ajax random malware page popup generator.

This is a free 3rd party visitor counter java script that my wife found somewhere that looked pretty and she put it on her blog where it counted away for years until a few weeks ago. 

Brute force and ignorance. It was only after I found out it was the culprit and researching www.freecounterstat.com that I stumbled across that website keyword in this article that described the same issue we were having. Crazy thing about that story is that the author contacted the makers of the script and they replied back with "

Hi,
I turn off popup on your account
chris
GREAT! Thanks Chris.. Were they hacked or is this something they randomly turn on for sets of clients to generate click revenue for their free tool? I vote for the latter. 

Don't use scripts from www.freecounterstat.com. Malware sucks. 

Along the way I learned about Scriptsafe, a google chrome extension that stops scripts from running on web pages you can set to trust or distrusted. Worth checking out... 


Sunday, December 09, 2012

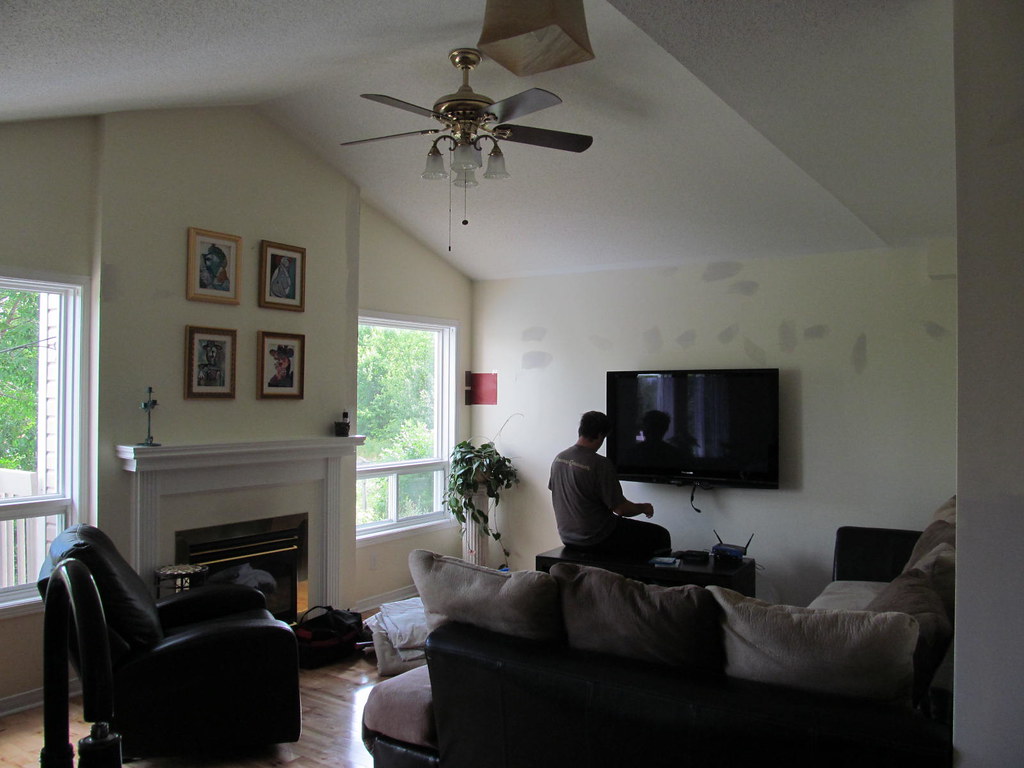
Fireplace Reno Nov/Dec 2012

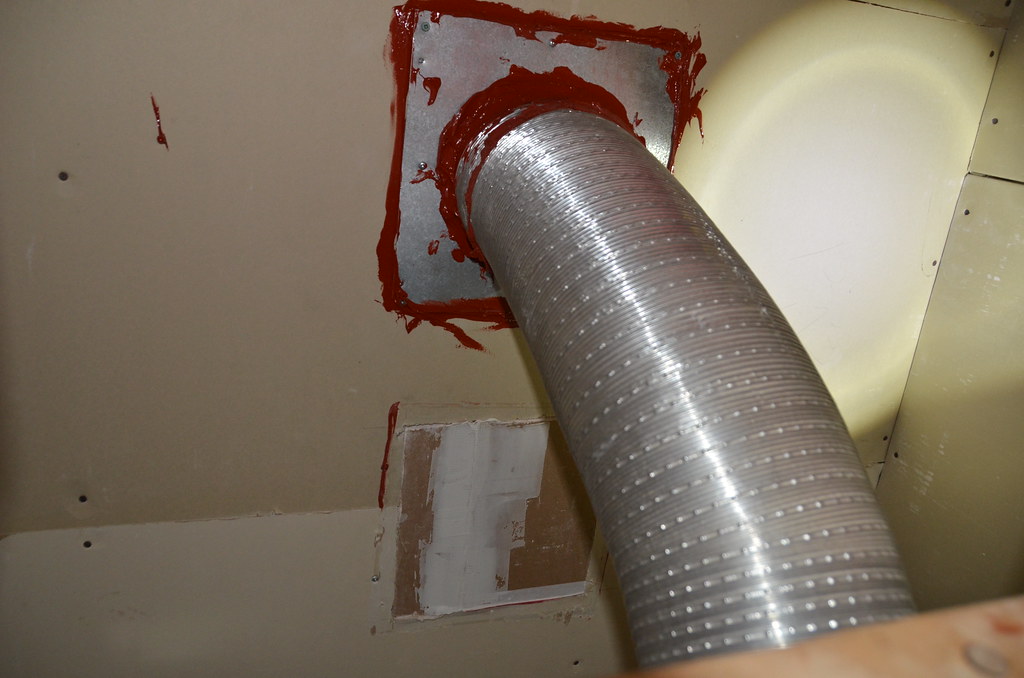
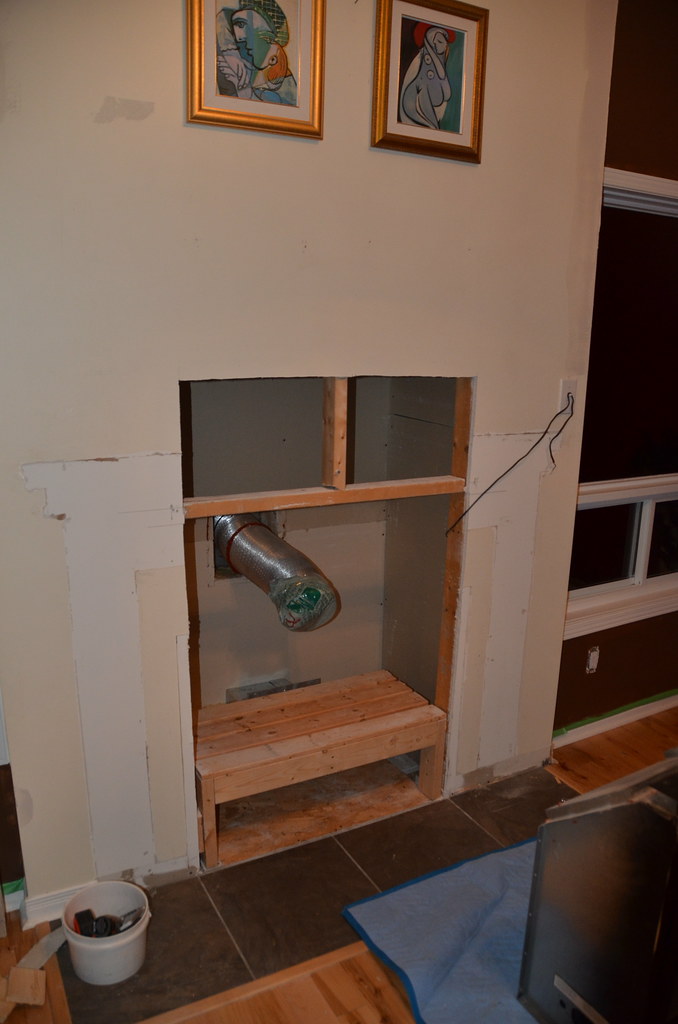
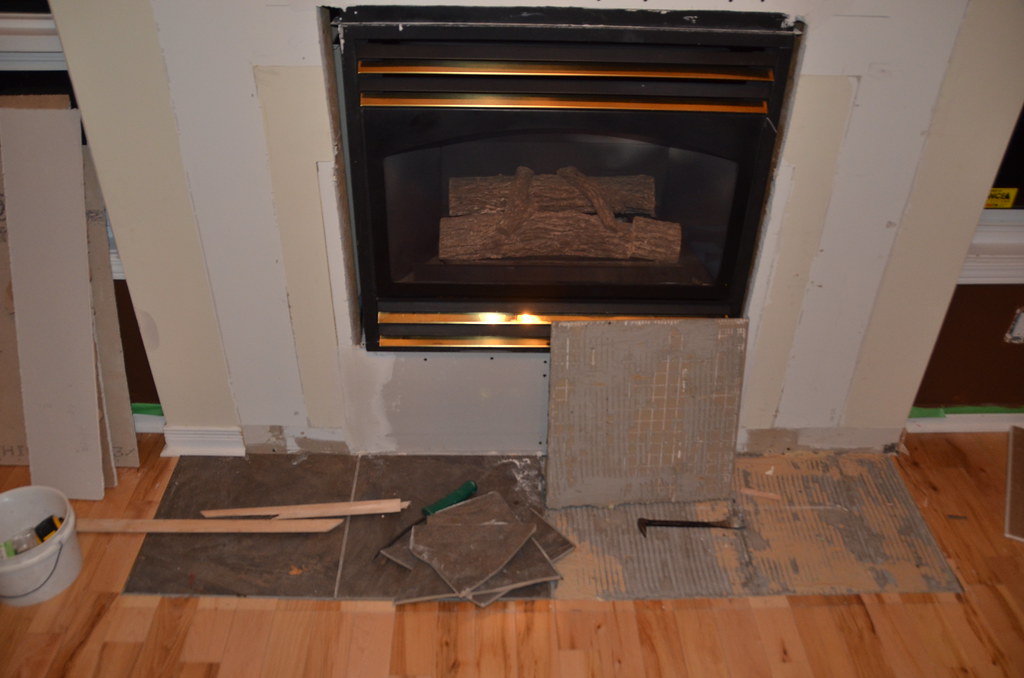
  This one has been on the list for a few years and I finally got to it the past few months. I ripped out the old fireplace mantel and tossed it. The old fireplace was flush with the floor and we wanted it raised up about a foot which added all sorts of complications. In order to lift it up we had to relocate the outside venting upwards 12 inches (cutting a new hole in the outside of the house) and get the gas line moved up accordingly.

There was a large metal cover on the outside of the house that the direct vent came out of and we lucked out because it was 2 feet high. We ended up using some of the empty portion for the new placement. The empty top portion was part of a heat shield and we used that area for the new hole and left a small heat deflector in place. We tested the heat after installation (leaving it on for an hour at full blast) and there was no major heat build-up. All my neighbour's houses with the same gas fireplace just have the single 12x12 inch panel. Why ours was 12x24 inches I'll never know (a screw up at build time? It worked out though).


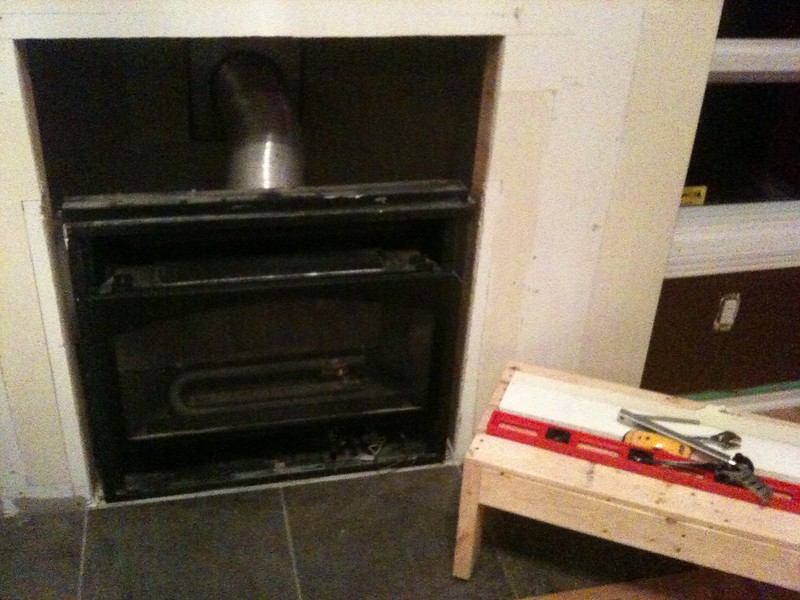
I built a bench to sit it on (it was sitting on unfinished plywood when I opened up the wall so I knew that would be ok), cut up the drywall, hauled the fireplace out and sat it on the bench. We got a natural gas guy to move the gas-line and do the venting to code.
  At this time we took the opportunity to get rid of the tile hearth and just continued the surrounding hardwood right to the wall.
This was great fun (not) because you had to slice up the existing interlocked boards with  a saw, chisel them out and then wack the new ones into place with a hammer and another piece of wood in between to keep them nice and un-dented. When they were in place I just pre-drilled holes and screwed them down as opposed to renting a nail gun. I found some long narrow screws for the job and they worked great.  With the hardwood done it was time for the stone veneer.

I had purchased a wire mesh backing at first, with the intent of screwing it into the studs for re-enforcement but took it back after doing a lot of reading and talking to various people. This types of stone is meant to go directly onto drywall (lick and stick). The stone came in boxes of 24x6 inches so each box did 6 square feet. I calculated the facing area of the fireplace wall, both the 3 inch deep sides, minus the hole for the fireplace, minus the mantel, added 10% for wastage (in the end I had 5 tiles left in case we have an earthquake and some fall off).

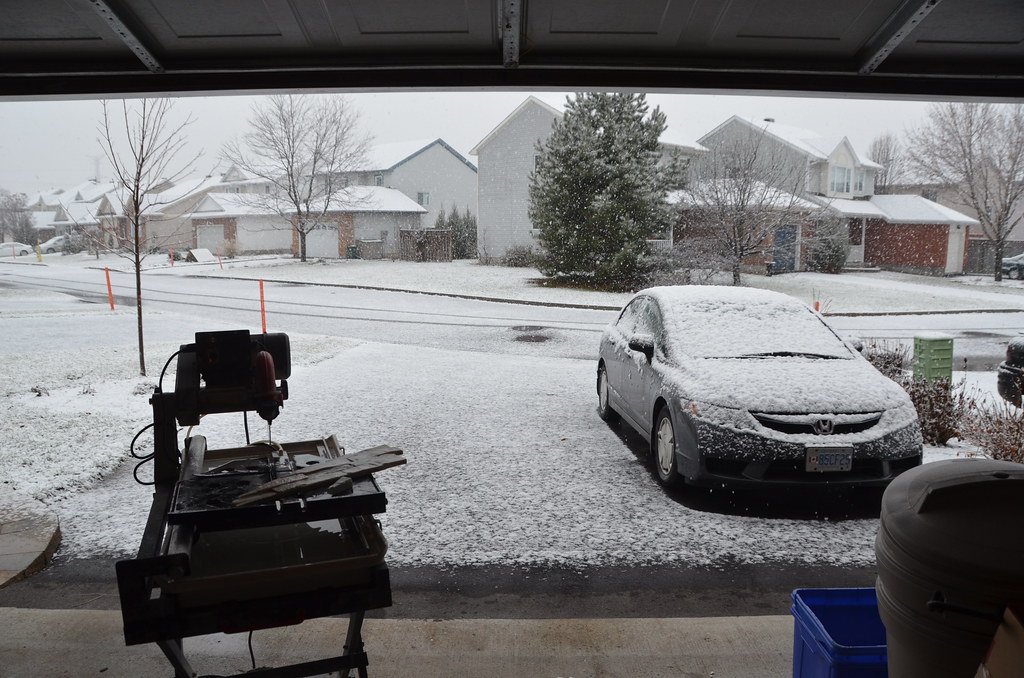
It was winter and snowing so what better time to get out the wet saw and start cutting! Tip to other Canadian December do-it yourselfers. Fill the water tray with boiling water. Because the stone sets have interlocking corners, it's easy to lop one off these "ears" off and keep it for use on the far side when need be. Another tip someone gave me was to use pre-mixed mortar bought in a big tub. With the correct mixture every time, you're guaranteed a consistent adhesive all across your project.
I laid a coat of mortar on the wall and scraped with with a notched trowel and back-buttered each tile before tapping it into place with a rubber hammer. When stuff came squiring out the sides I knew I had good adhesion (wipe off the excess with a warm wet cloth). I checked each stone piece with a level before moving on, shimming slightly here and there with sticks to maintain a good level (these stones are not totally level and neither was my floor/wall). I installed a mantel and that made for some interesting cuts around that and the fireplace switch box (I brought this out about half an inch to be flush with the stone). For these cuts and the angled ones on the ceiling I used an angle finder and made paper forms which I then traced onto the stone. If anything, i went a little big, test-fitted and then went back to trim until it fit perfectly. For the sides I just cut a pile of 3 inch wide pieces and stuck them in place. In most cases the front piece stuck out to form an overhang of about a half inch. Due the the variance in the thickness's of the stone it was impossible to be flush everywhere so I didn't really try. It makes for some very interesting adjoining pieces and I actually like it like that.

The stuff was pretty easy to work with if you know your way around a wet-saw and it's hard to make it look bad if you know what I mean. Thank got it's finished so I can go back to killing Zombies on by Xbox and playing guitar....


Wednesday, December 28, 2011

Taylor lake Yurt Gatineau Park 2011-12-18

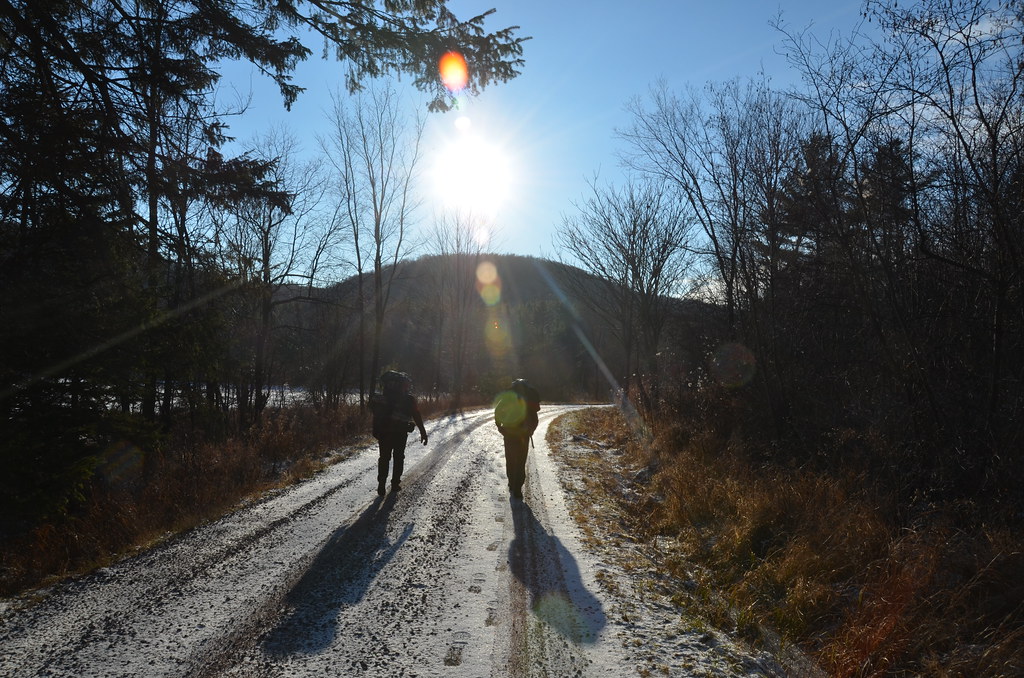
Tripper, Kenmore and I made our annual winter camping hike into Gatideau park this year a week before Christmas 2011. There wasn't enough snow to ski in so we walked it the old fashioned way. I had finally picked up one of those "Canada Goose" winter coats that make you look like some sort of arctic scientist/explorer (I've been seeing people in the bush with them for the past few years and have been wanting one for awhile) and the darn thing is TOO warm. I was sweating bullets after the first hour.


What I like about it though, is the absolute ubiquitous orgy of pockets and zippers everywhere, not to mention the huge sewn-in strap at the back to make it easy for your buddies to haul your body out of the woods should anything go wrong.


There was a nice sheen of ice on the lakes when we went in. Not strong enough to chance a walk on but strong enough to bounce big rocks off of (see the vid).


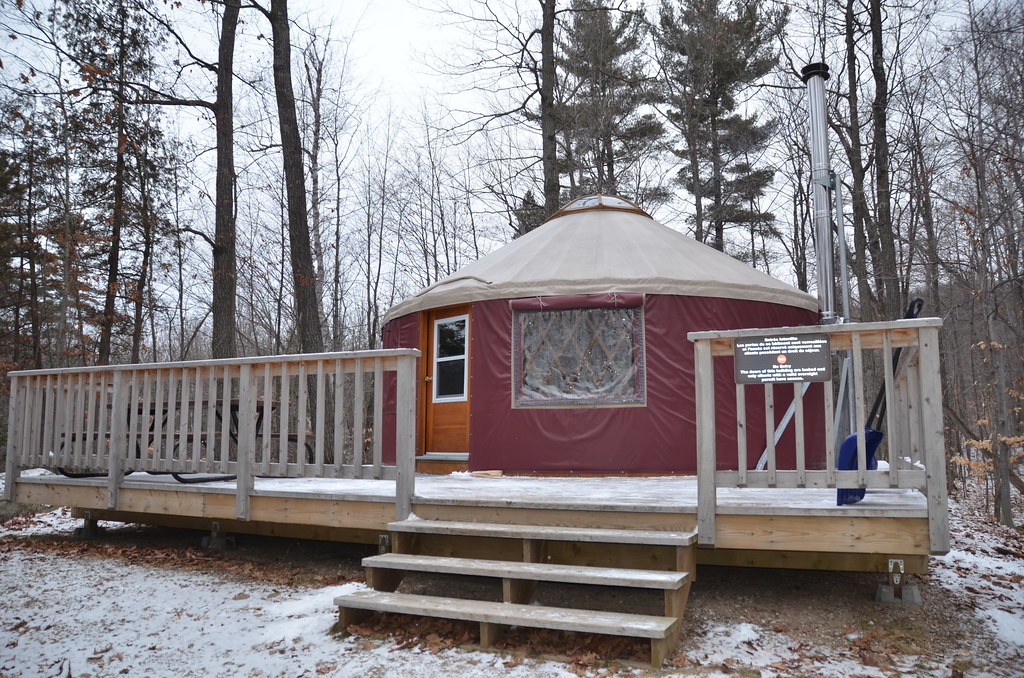
I skipped bringing a sleeping back this trip, because I have not ever needed them in past trips, the cottages and huts, etc being so warm you just sleep without one. This trip was the first time we stayed in a YURT though. A thing about YURTS.. They cool down right fast when the fire goes out. A funny by-product of this is that the guy with the lowest Celsius grade sleeping bag (make that no sleeping bag) wakes up cold in the dead of night and is going to be the one who restarts Mr Fire so he doesn't freeze to death while the other two guys (I know they're awake) pretend to be asleep.

The insides are pretty snazzy, plenty of room to get around in. The sides of the thing look like a heavy vinyl material (nothing that would stop a bear or other large mammal intent on gettin' at ya). The main feature is a huge skylight that you could crank open a touch with a long pole. The inner walls are supported with a lattice of old-fashioned baby gates. The bunks were adequate, a 6 foot person just able to fit and brush the bottom of your feet on the metal rails. 

The wood burning stove was plenty warm, just that it needed stoking about 3 times during the night (by Mr No Sleeping Bag here).. There was even a gas stove for us to cook on. After eating way too much food - it's easier to carry it out inside you than in your backpack the next day(  actually depending on how your body works, there might not be all that much to carry back. There's this type of bowel movement called "The $h1t of Life"!)

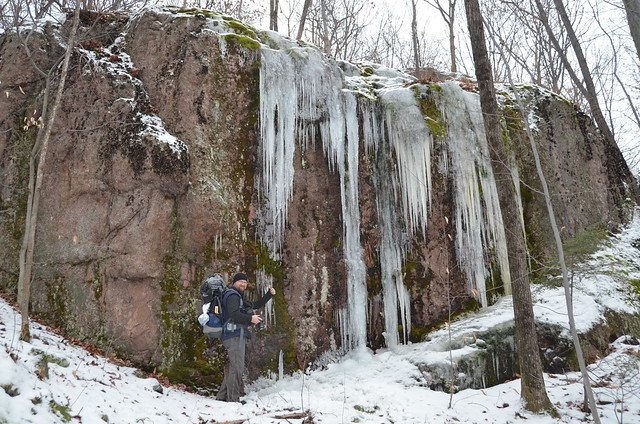
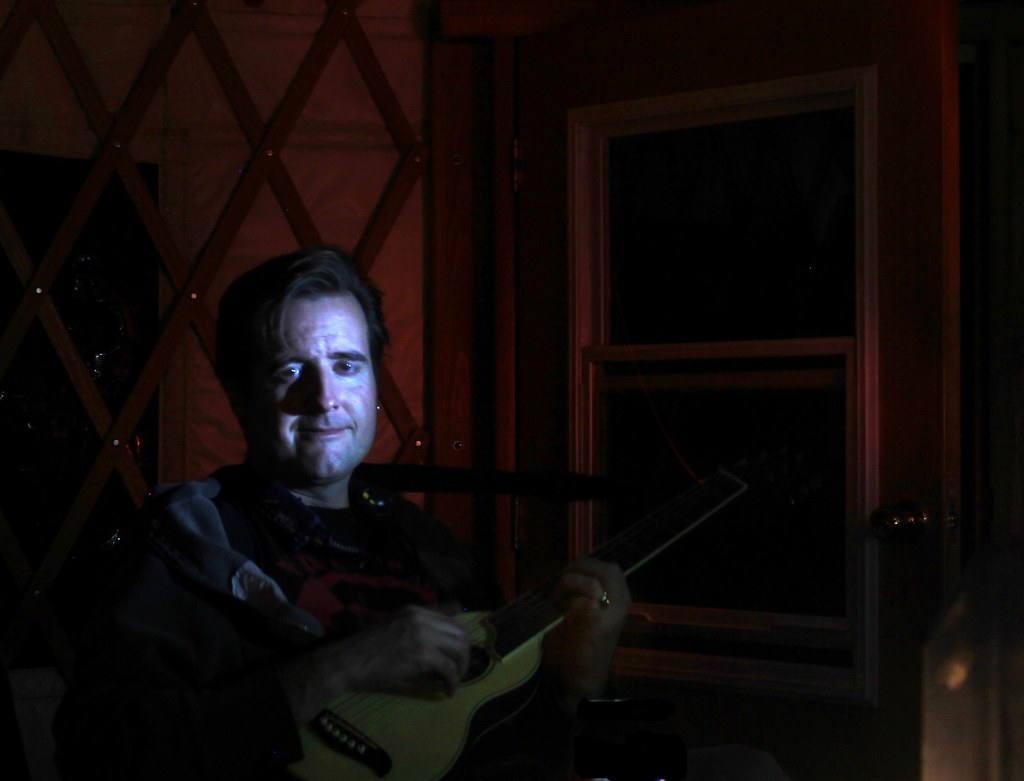
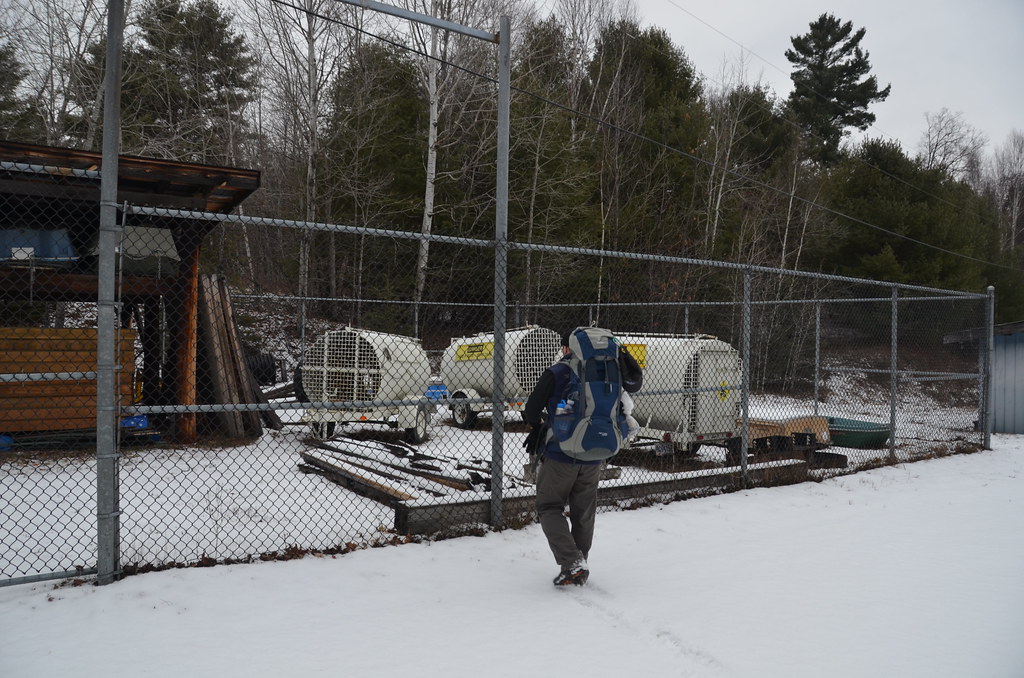
I had brought my mini Washburn Rover "travel" guitar up and we had a concert to end the evening off. All in all it was a good hike up. I'd do a Yurt again, just remember to pack a sleeping bag. In the cabins, you don't seem to need them. The next day we hiked out over some fresh snow, took in some nice natural ice sculptures, and stumbled into some place they store a pile of extra equipment in the Park, including the BEAR CAGES. This is a towable cage that you stock with some type of attractant (like a poodle or something) and when the bear goes in it slams shut and you can truck him outta there. It must be very disturbing to have one of these show up in the camp site next to you out of the blue.


All in all a good trip. If you join us next year, remember you don't need a sleeping bag (I want someone else to get up in the middle of the night and fix the fire)


Friday, November 18, 2011


"I wonder if I can eat that human?"


The Coyotes out back were big this year. There's a guy who walks his Golden Retriever out there and I know how big that dog is and there are a few of these Coyotes that appear to be the same size. This guy was trotting in for a better look but took off when I cracked a bullwhip. Everyone once in awhile a pack of them will nab something at night out there and they yip and yap for hours as they gather around the dinner table. Sometimes a fire truck going by at night also sets them off, which is pretty funny (must sound like one big coyote to them).


Coyotes can be dangerous. Check this crazy guy out. The thing is trying to eat him. They are pretty though.

Monday, November 14, 2011

Everyone's first Mistake in Skyrim...

Was mine as well...It goes something like this. "Hey, what's that? A Giant? I wonder if I can kill it?"


Then they take a kind of up-swing with that stick with the large rock affixed to it and you get a great view of Skyrim from space.It happens to everyone the first time they go to do this, so much so that people post  memes on image boards. Skyrim is they best RPG to come around in a long time.


Friday, October 28, 2011

Acoustic Guitar video tutorial of John Mayer's live version of "Neon" from Where the Light is with TAB

I finally got around to making a video tutorial off my TAB of this cool piece I transcribed back in December 2010 after going on Youtube and seeing countless people butcher the thing. (see previous post here).

First off, the latest tab is here

This is the video for the Intro:

This is the video for the middle part:
And this is the performance it is taken from.. Awesome stuff!

Bluesfest storm broke my tree


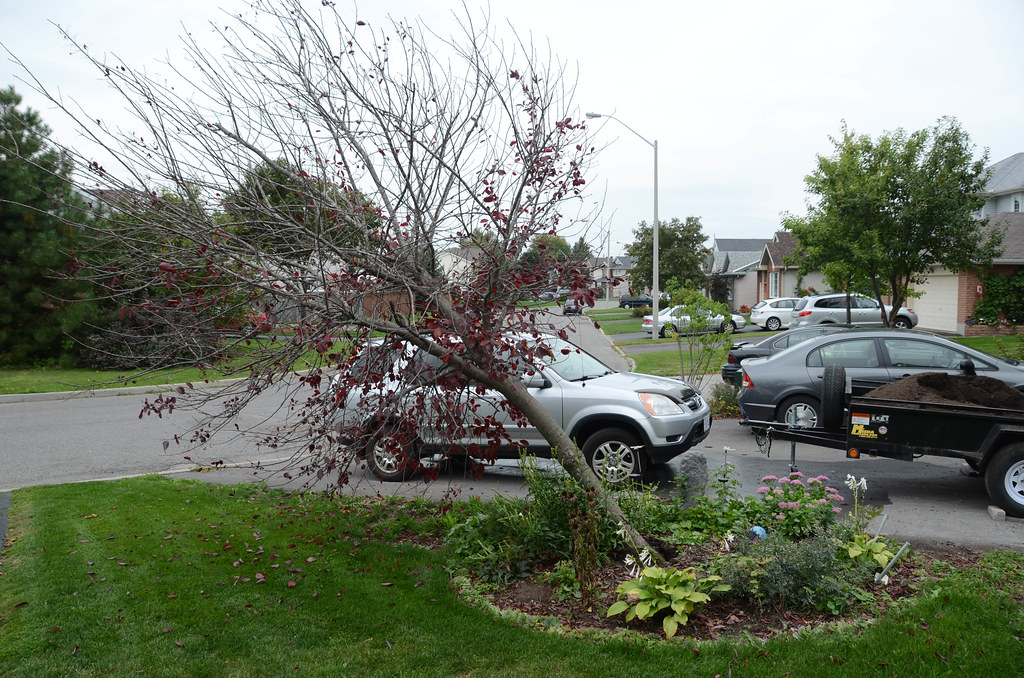
That big storm that chased "Cheap Trick" off the stage at Bluesfest this summer minutes before it collapsed also snapped the trunk of the tree in my front yard. I tried re-seating it and propping it up with straps (most of the roots were still intact, it had developed a root collar from being planted too deep) but it wasn't going to work. Thankfully we had some friends with lottsa land and we went and picked out a tree. At first I was looking at HUGE trunk diameters but then quickly realized that if the tree was going to be removed by hand, it was gonna have to be of the Charlie Brown variety. Maybe we can give it tree steroids this spring....


Wednesday, September 07, 2011

Interlock project from Hell Summer 2011

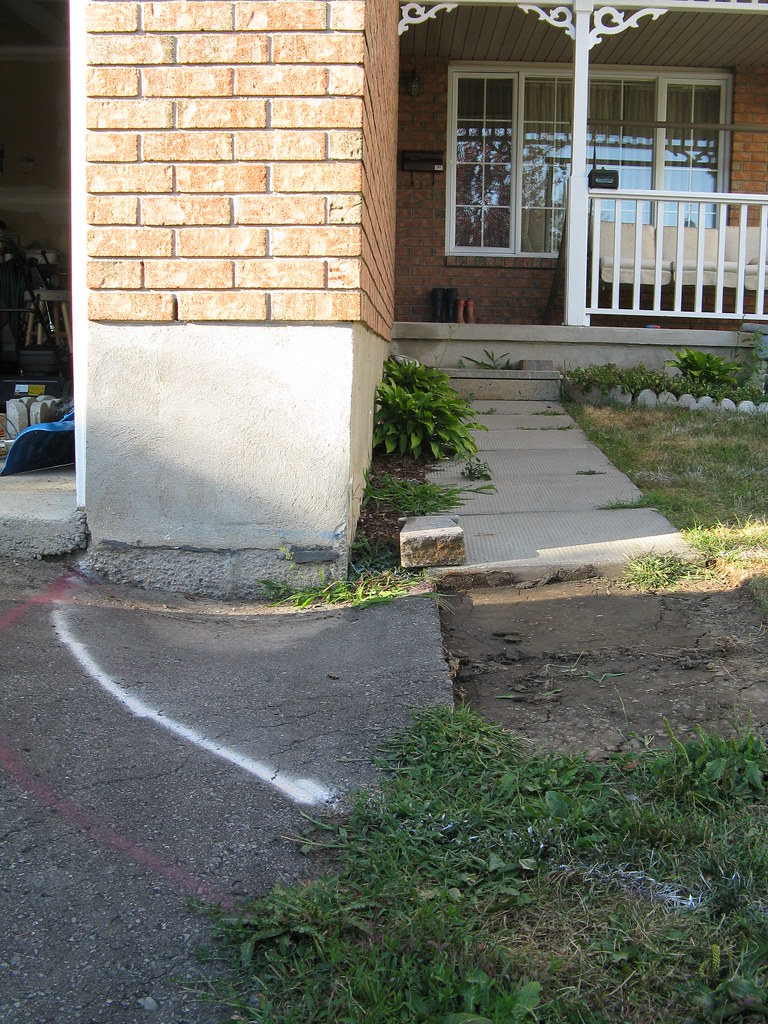
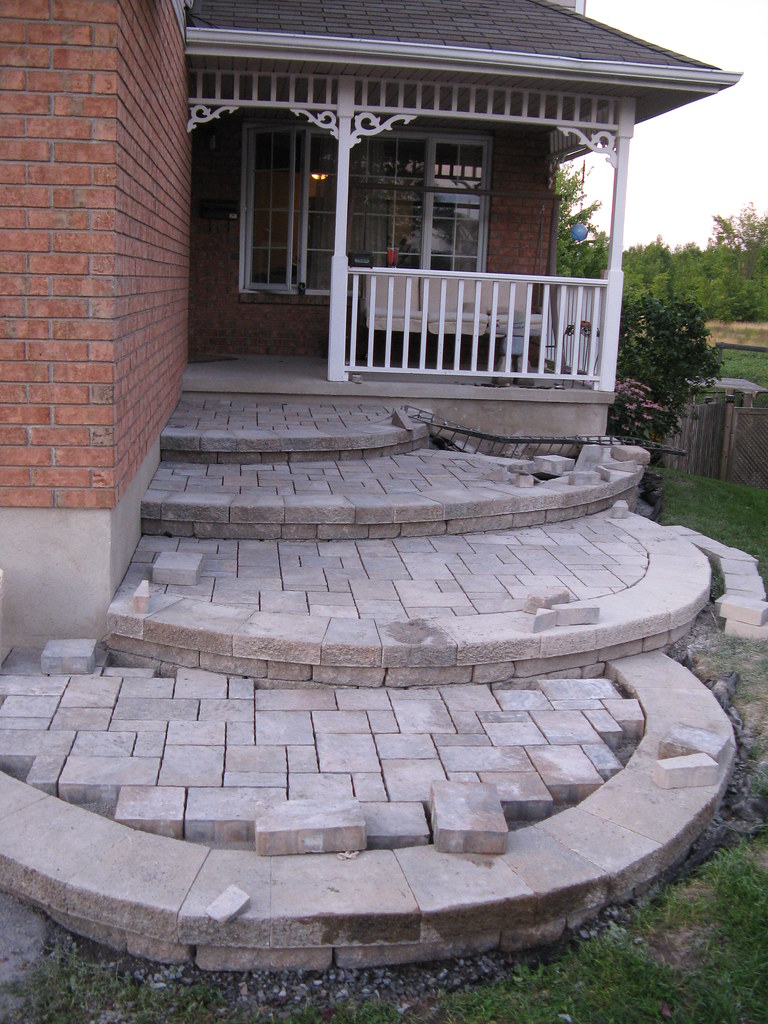
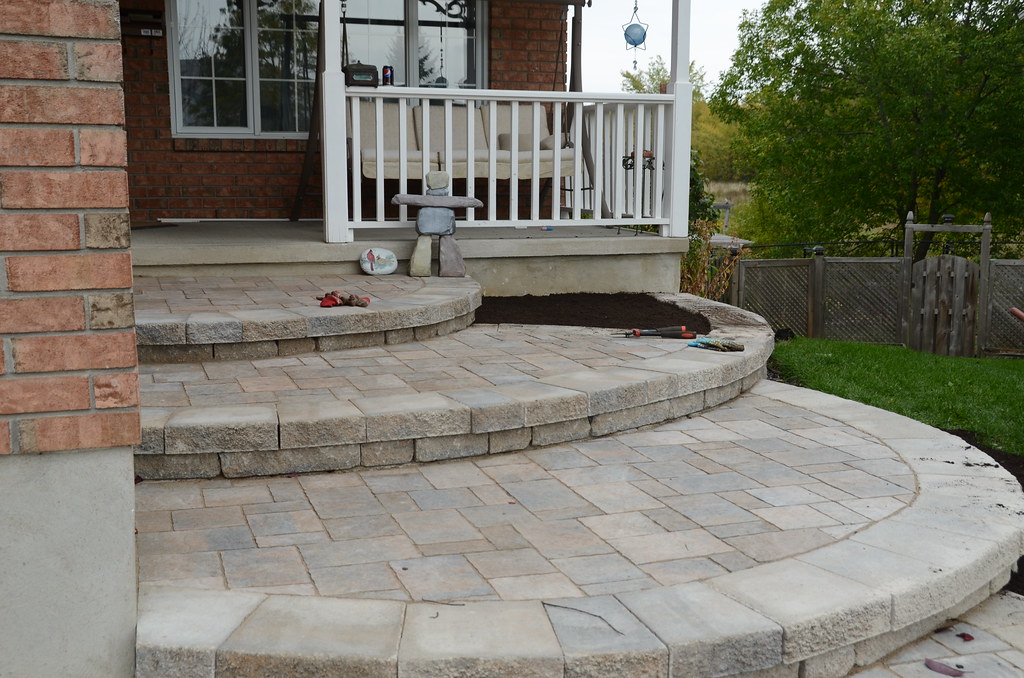
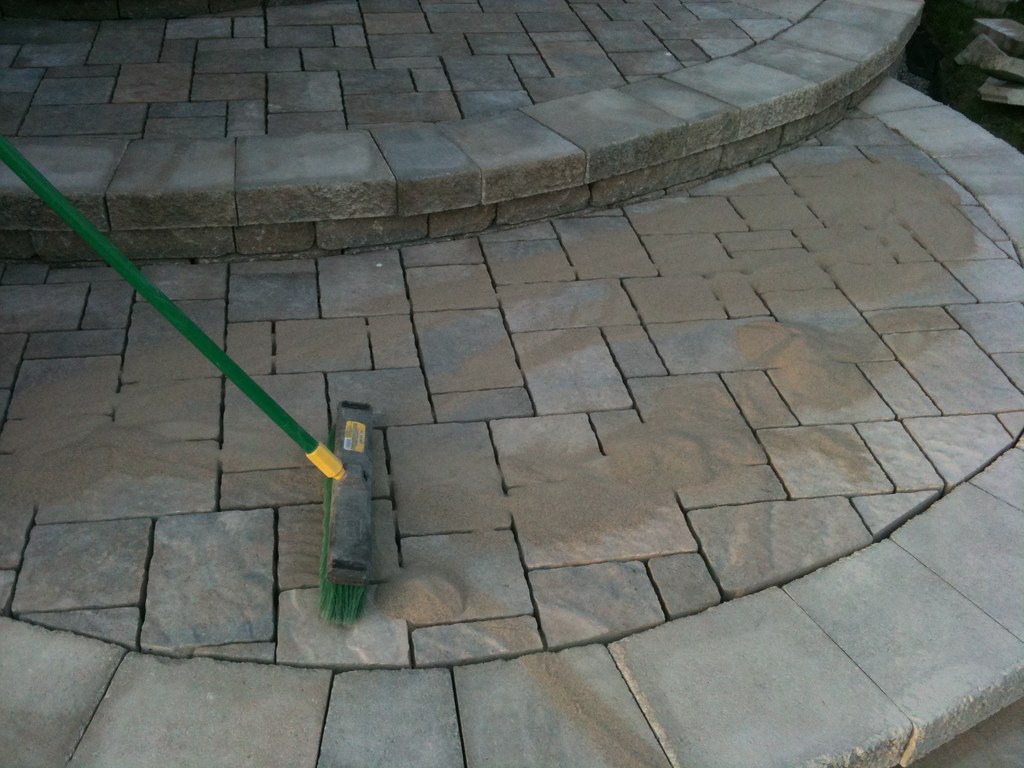
We were tired of the boring paving stones that came with our house and all of our neighbors were getting snazzy interlock entrances done so we decided to give it a go ourselves. My wife designed an intricate multilevel circular design with intersecting cuts and we got a line on a place that supplies the home stores with brick (why buy from Rona when you can buy from the place that sells to Rona?) so we got a catalog and went out to the place to choose the brick. The place only sells to contractors and I had a friend who did contracting on the side who would place the order for us when we were ready. My wife and her friend had designed the layout in Autocad with a ton of measurements and one nice sunny day we went out to spray paint the design on the front lawn. With the design being made up of four huge circles (the largest being an almost 19 foot arc) the best way to do this was to stake out sticks at the radius points, attach pieces of string cut to the proper radius length to the sticks and follow the extent of the arc leaving a spray paint trail behind.

Holy crap it was huge. We won't have any lawn left. The early design also incorporated a pathway that seemed to drop off into space and probably create work for me later (follow the yellow brick road) and two built-in planter areas for bushes or flowers (heck a tree if you wanted). The pathway ended up cutting right to the neighbors property line so we had to simplify. The circles all got tightened up, the pathway disappeared, we only left a single planting area and we got something we both liked. We had picked out a wall product and pavers so now it was time to order the stuff. We started by staking out the new design, spraying it onto the lawn again in a different color and checking all the measurements one last time.

It took me three days to figure out how much product to order - and that was with a hyper-accurate plan. One of the problems was that I had to impersonate a contractor in that I had to pretend to know what I was doing. Contractors order by skid layers. Johnny homeowners like me walk into home depot, grab a cart, and start piling bricks into it. When I screw up and need more, I go back and buy more. So how many blocks in a skid layer? I spend a day googling charts on the Internet until I found palette layouts I needed. What sucks about ordering by the skid layer is, if you get 16 blocks in a skid layer and you only need 8 blocks then you get another 8 just for fun! Contractors also deal in some weird measurements like wall square footage. I don't need to know that, my wall is two bricks high for the most part, I just have to know how long and how many levels of brick I'm piling up. So I had to simplify a lot of the numbers to make sense of them. The capping was weird too, they have this formula you so where you take your linear footage and multiply by 2.68 to get the number of modules you need, and a module seemed to be a collection of three bricks,an A, a B, and a C. I spent half a day staring at the front lawn trying to visualize where everything would go and when I ran into problems in my head I realized that I needed a 3D model to be sure I had it right.

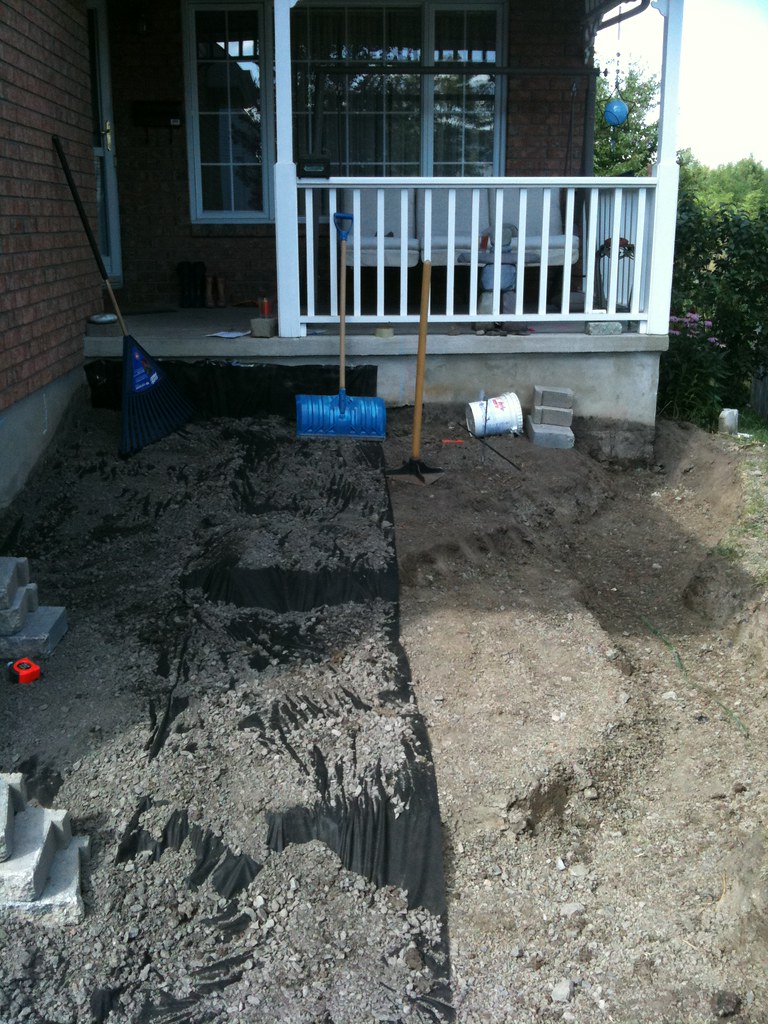
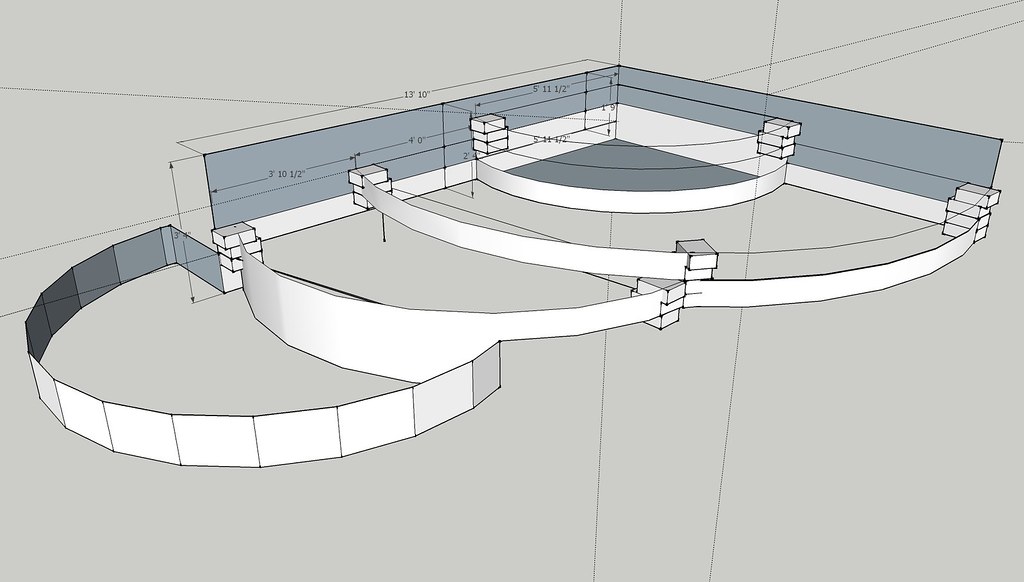
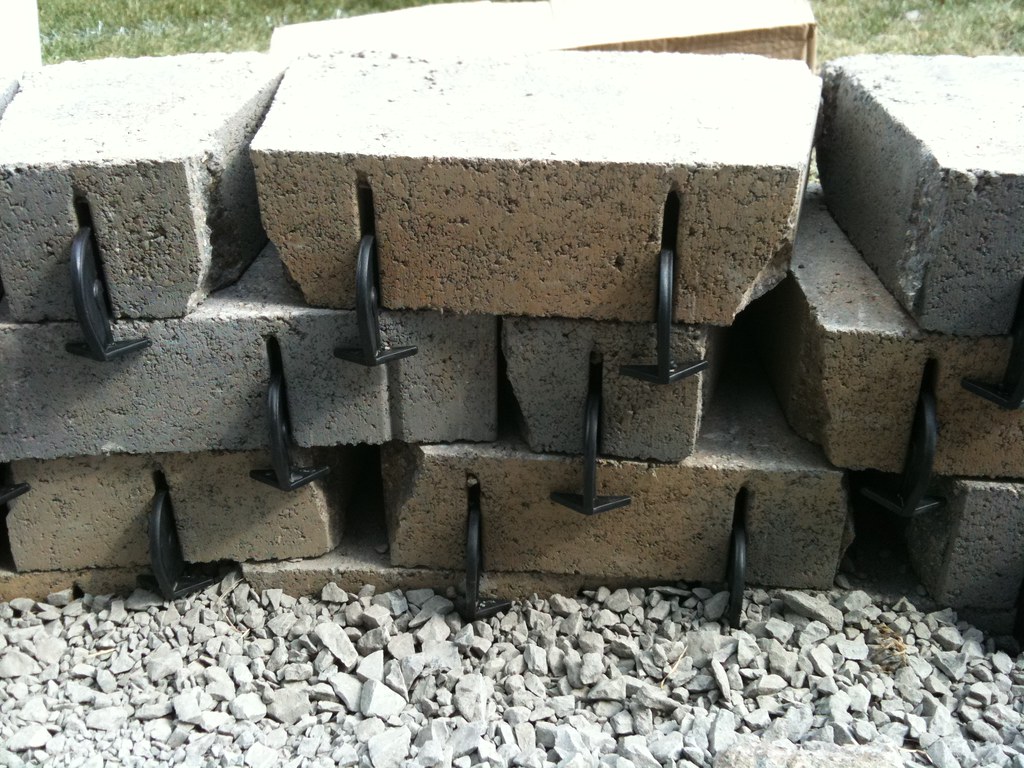
I used Google 3D sketch up to mock up the interlock layout in 3 dimensions and that's where the problems began to show up. When it was designed, the layout did not take the dimensions of the product into account. We had worked out a 5 and a half inch step height but had bought a product that was 3 and a half inches high. Quickly we changed the design to use a 7 inch step so each step ended up being 2 bricks high. The way walls are made there should be a hidden row underneath for the wall to sit on so you end up buying a whole row of wall just to bury it :-). Excavation was also an interesting proposition. I wanted 12 inches of crushed stone underneath everything but since my lawn slopes up to the house and the design was a bunch of terraced landings I figured I probably didn't have to dig up the whole front lawn. Turns out I had plenty to dig (underneath the outside of all the walls and the first two circle landings) but the rest of it was piles of crushed stone. Getting rid of the earth was easy, I just dumped it in my back yard to level off the back of my property. The crushed stone was also readily available at a small quarry up the road for $32 a loader bucket full (my Dad has a trailer and I must have done 7 runs to the place and emptied with a shovel all on the front lawn).

A few days later the skids showed up on a delivery truck and there was a small problem with the order my contractor friend had put in. The supplier had misunderstood and I was missing about 34 capping blocks. I had to make a trip out to the place to pick up the missing blocks after weighing the A,B,and C ones on my bathroom scale and calculating it to be 1400 pounds (They weighed 57, 37.5 and 27.5 pounds respectively). I needed to make sure the truck I used would be able to take it. Knowing the weights of the stones was useful when the forklift operator pulled up to the truck and let me know I was going to lift them off individually by hand and load my truck with them. Woohoo!

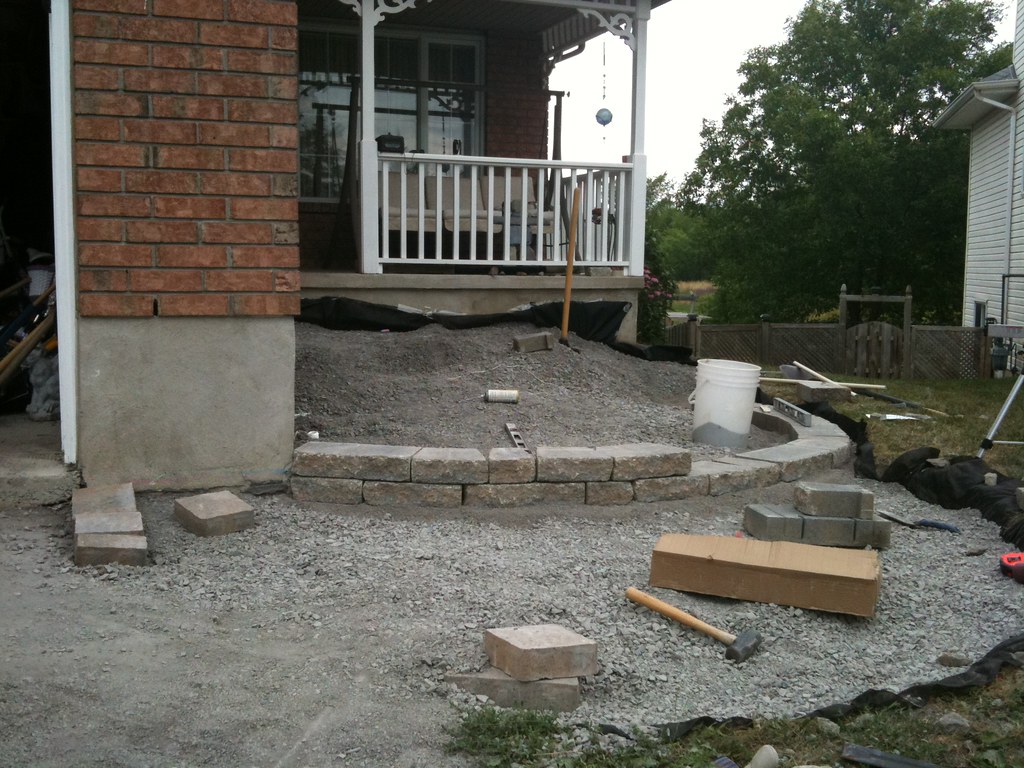
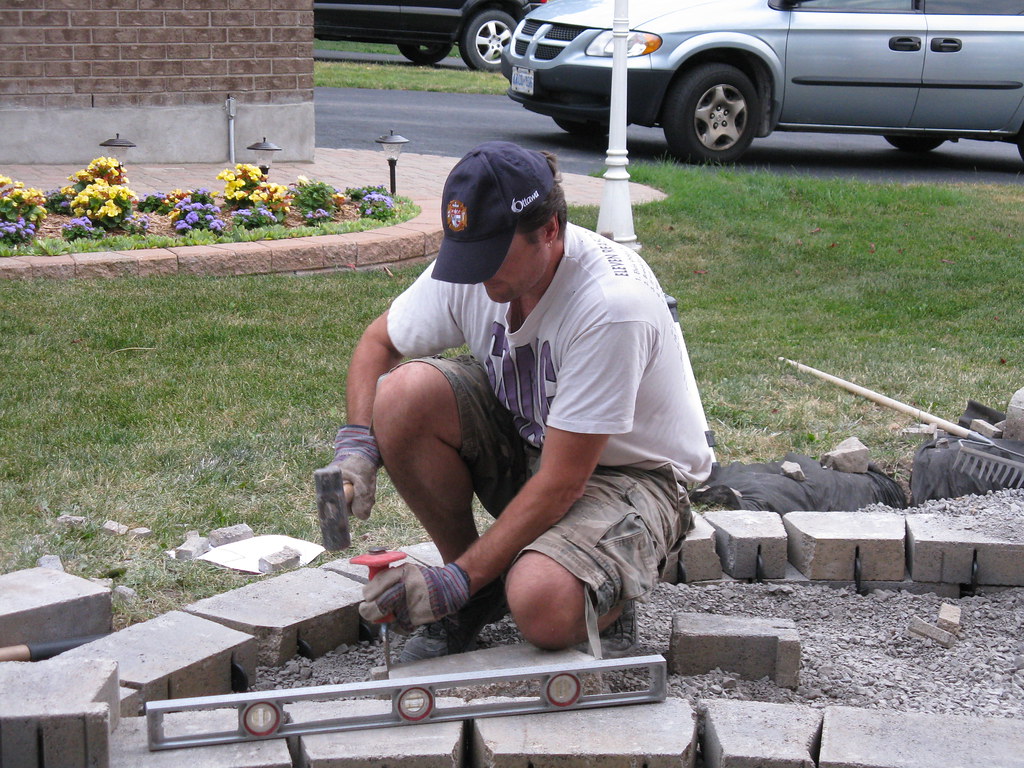
The next day I started laying out the wall and the caps. The first level was ok, the second one was better and the third one was pretty much perfect so I went back and recut the first one. I discovered that in order to cut a nice curve you need to place the two blocks side by side on a curve, measure the outside edge of the triangular space created by the curve and distrubute it evenly across the front of the bricks where they touch side by side. This gives you radian shaped wedges that form a natural curve. Fortunately I was able to borrow a cutter. Unfortunately the cutter only had a 3 inch cutting depth and I had 3 and a half inch blocks. That meant I had to cut every block at least twice, on the top and again on the bottom. Furthermore, the blocks were 12 inches long and the max length I could cut was 10 inches. That meant each block was actually cut 4 times, top, bottom, front, back. A lot of blocks were cut on both sides so that was 8 cuts per block. I got fancy in the areas where the bricks met at the curved arcs and recessed them (so it looked like it was coming out of the wall). I cut a lot of blocks.....

As I was outside doing all of this fun stuff I got mistaken for a contractor no less then 3 times. Neighbors would wander over and ask for a quote. Then I'd take my safety sunglasses off and they'd go "Oh sorry, I didn't recognize you, Oh so you're doing this yourself." Other neighbors that caught on to this would come over and offer advice. Most of it I already knew and had researched but one or two had some great tips. It's amazing how many people think that landscaping fabric is there to stop weeds. Weeds need sunlight and the seeds come in from the top and wedge between the cracks of your brick. The landscape fabric is there to prevent the soil from creeping into the crushed stone and shifting it. It provides a barrier between the two materials.

One guy alerted me to the fact that I was building some Hornet condominiums into my design by leaving nooks and crannies in the back. I took his advice and back-filled the hell out of them with large stone the little buggers won't be able to excavate.


As far as product ordering, it was pretty good. I was missing ONE capping block (think I was going to order a skid for one block?). I went back to the brick place and they gave me a demo block for free. It was not exactly like the other ones but it would do where it was going.

When I got to the bottom row, I ran into my last gotcha. I had not taken the slope of my lawn into account where it encroached on the design. I had to cover a 1 foot drop over 3 or 4 feet and it just wasn't happening. The angle looked horrible. It looked like I needed a whole new step (Hey, on the bright side, I was able to order my missing CAP and throw away the stand-in demo one).

Tips I'd follow if I was to do it all over again..
1. Take the dimensions of your brick into account during the design phase. If your brick is 3 1/2 high, consider a step height of 3 1/2 or 7 inches..
2. Don't forget that the top of your landing is kind of like a step (Doh!)
3. Nothing beats a 3d Mockup on your PC to find your mistakes before you make them.
4. Don't forget to take the slope of your land into account.
5. Tamp and compact they hell out of your crushed stone THROUGHOUT the process and wet with water between tampings. It helps later on. 
6. There's no such thing as TOO level. Get it perfect everywhere.
7. Don't aim your brick cutter at anything you don't want coated with a fine film of sand-blasted goop.
8. Do every step of the process the best you can make it. It's not worth doing it over later on.